
Hey folks! We’re back with another story for our readers. In today’s blog, we’ll discuss how to use the Annoucement feature on Cronberry dashboard. Before proceeding with it, let’s first discuss its table of contents for a better understanding of the same.
Whenever you visit a website, while scrolling through, you must have seen bars or pop-ups that appear on your screen saying ‘SALE ! SALE ! SALE !’ or just asking for your email address for regular updates, this is what Cronberry’s Announcement feature offers.
Let’s get started with a step-by-step guide.
- First of all log in to your Cronberry dashboard.
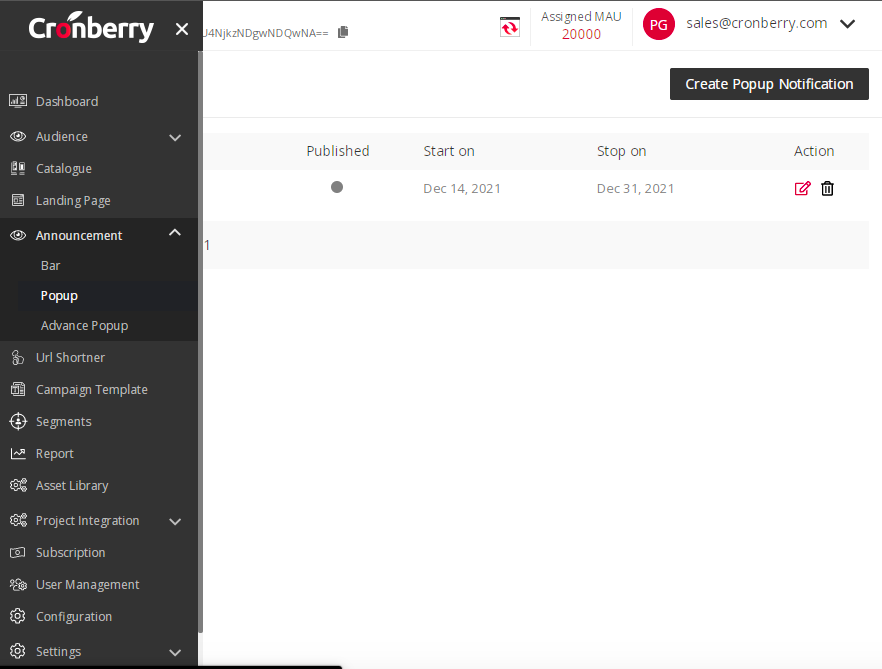
- In the left hand column, you’ll see the Announcement option, just tap it. Here are 3 available to-dos..> Bar > Popup > Advance Popup.
Let’s understand each one of them one by one.
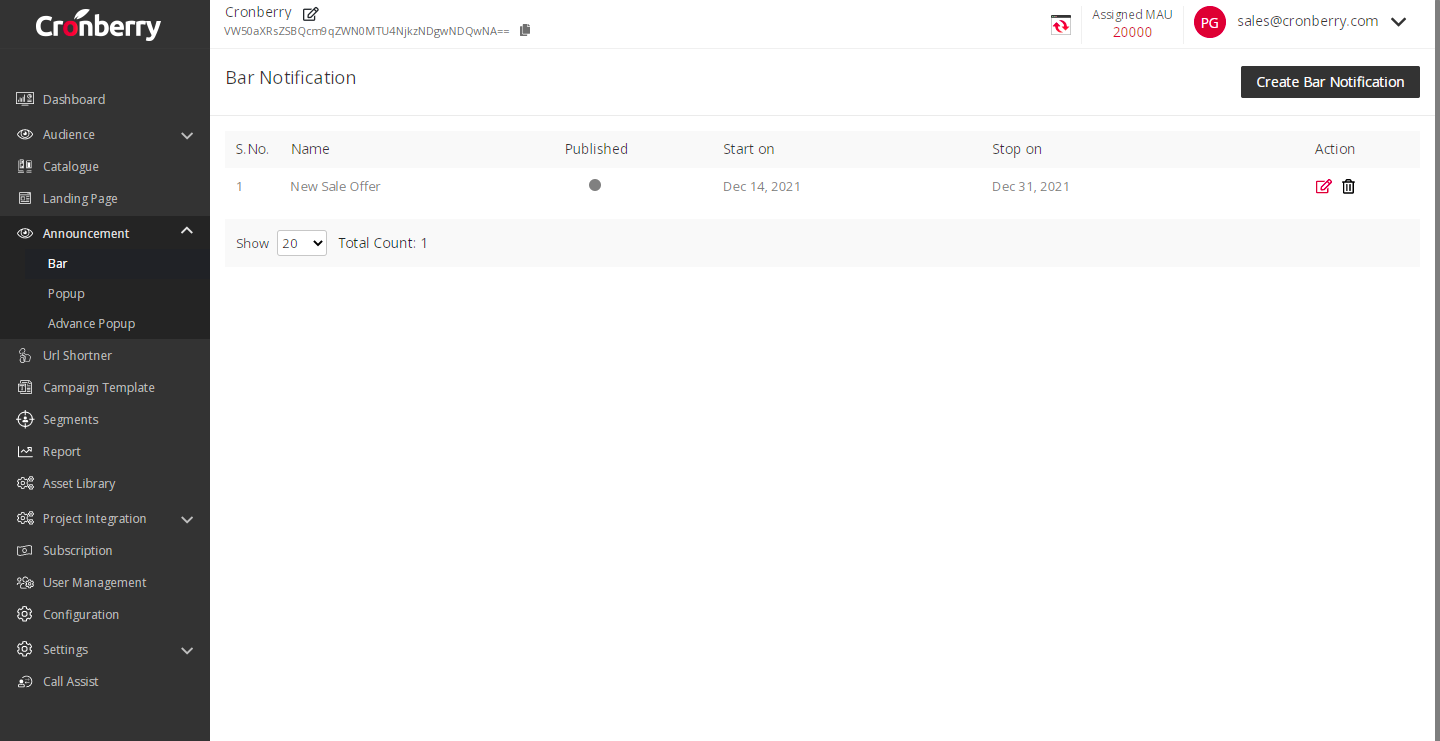
How to use Bar functionality?
- For Bar functionality, Tap on Bar and then tap on the Create Bar Notification located at the top right corner of the dashboard.
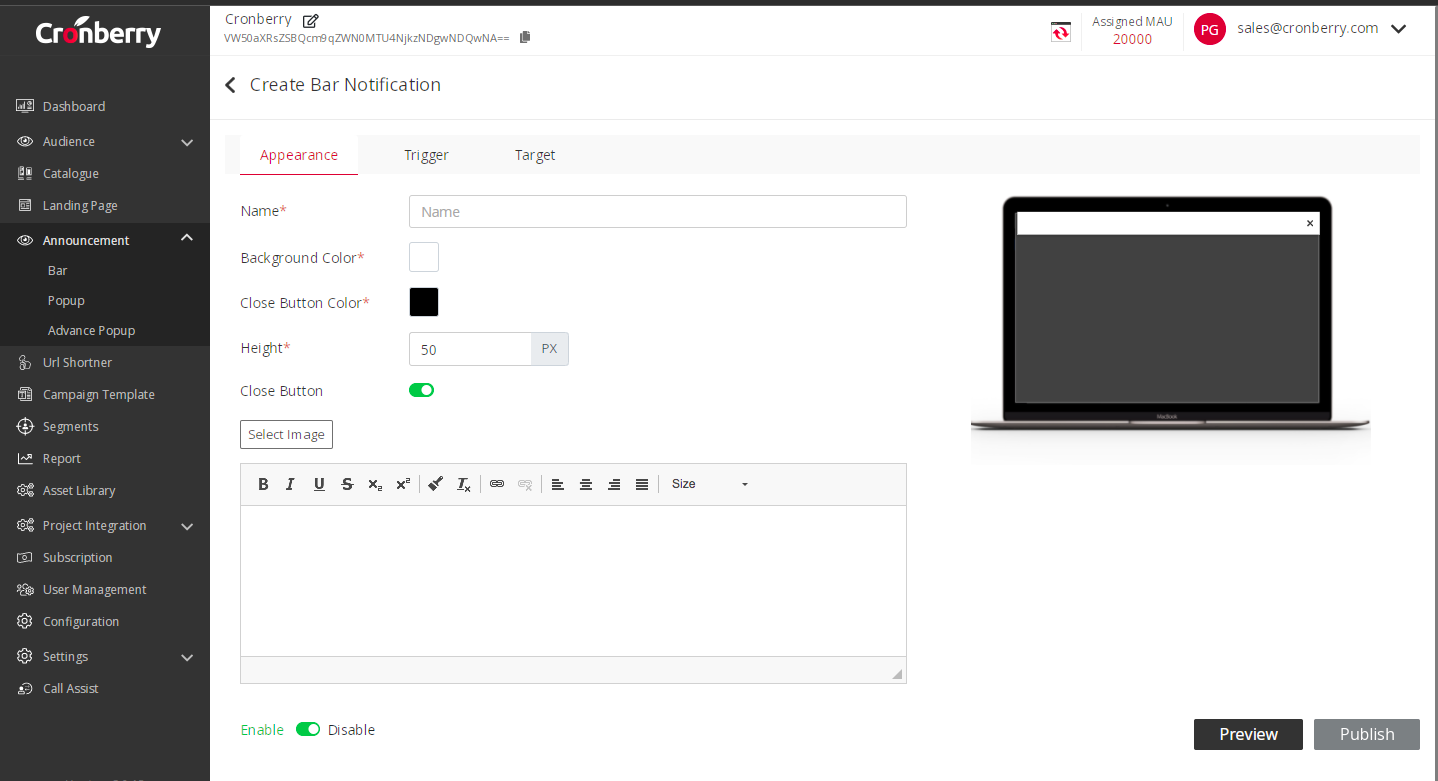
- Next, fill in the inputs as per how you want your Bar to look like. In Appearance, fill in the details like name of the Bar, background color, close button color, height of the bar and the content you want to publish.
- You can also select an image if you want to include visuals in the bar.
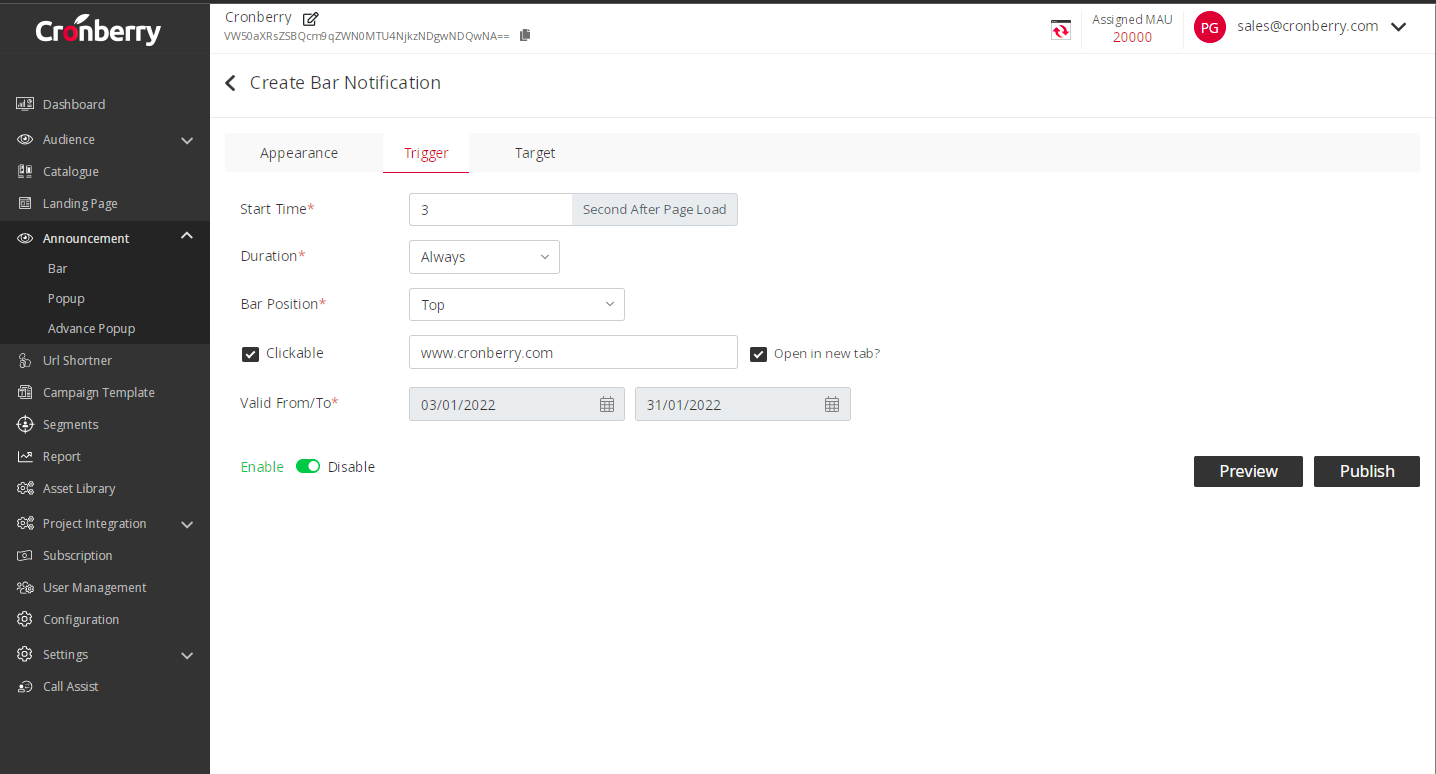
- Once done, in the next segment, Trigger, fill in details like start time of the bar, duration, bar position, days duration for bar functionality. You can also make the bar clickable by enabling the functionality and entering the URL of the webpage you want the user to get redirected to. Once done, tap on the Preview.
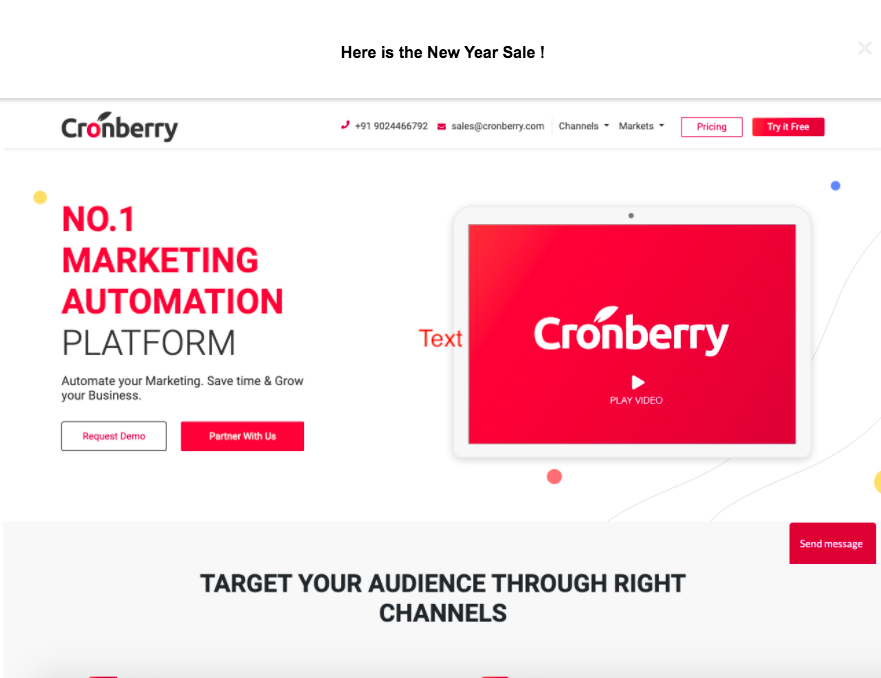
- The preview can be seen below. The bar appears on the top of the webpage whenever any random visitor visits your website within the set duration.
How to use Popup functionality?
- Next comes, Popup functionality. To get started Tap on Popup just below the Bar option in the Announcement segment. Now, click on Create Popup Notification.
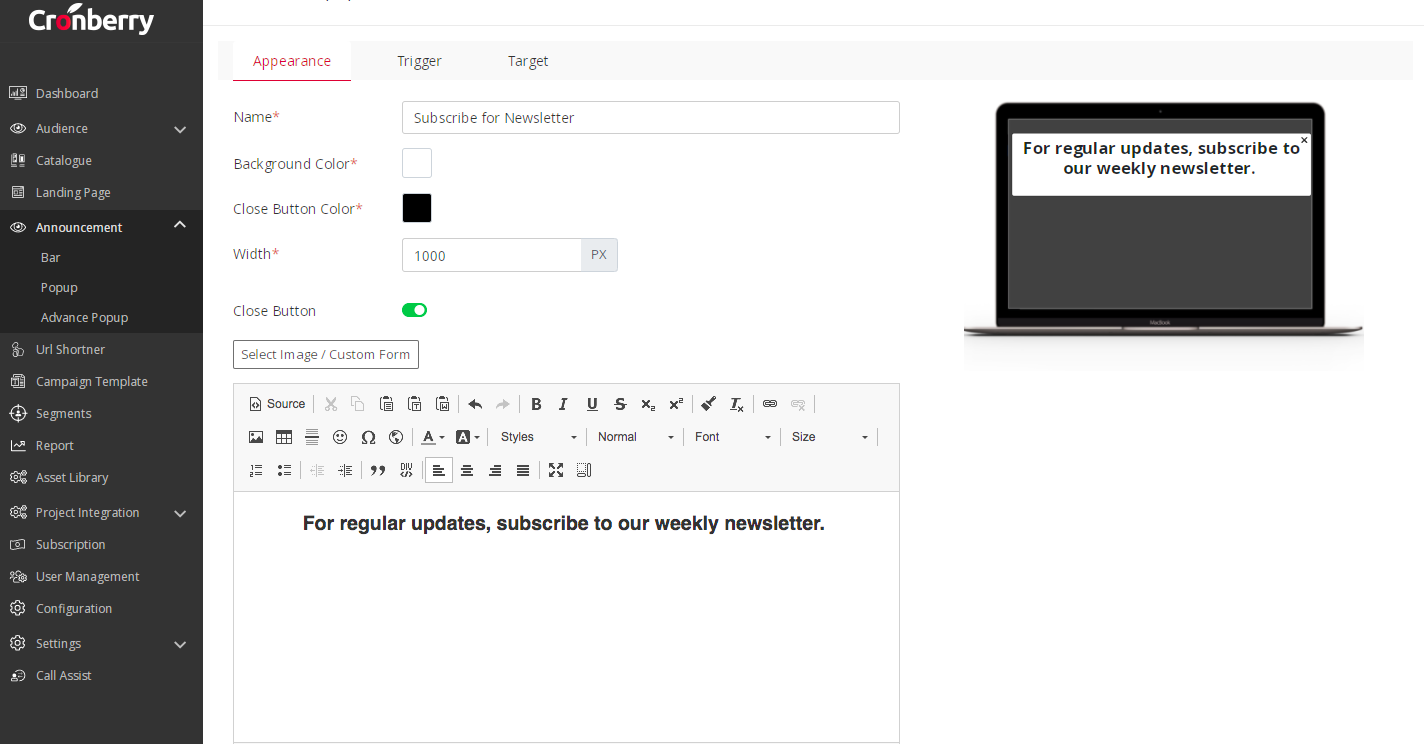
- Next, you’ll be redirected to the Appearance section, enter the details like popup name, background color, close button color, width of the popup notification and the content you want to display.
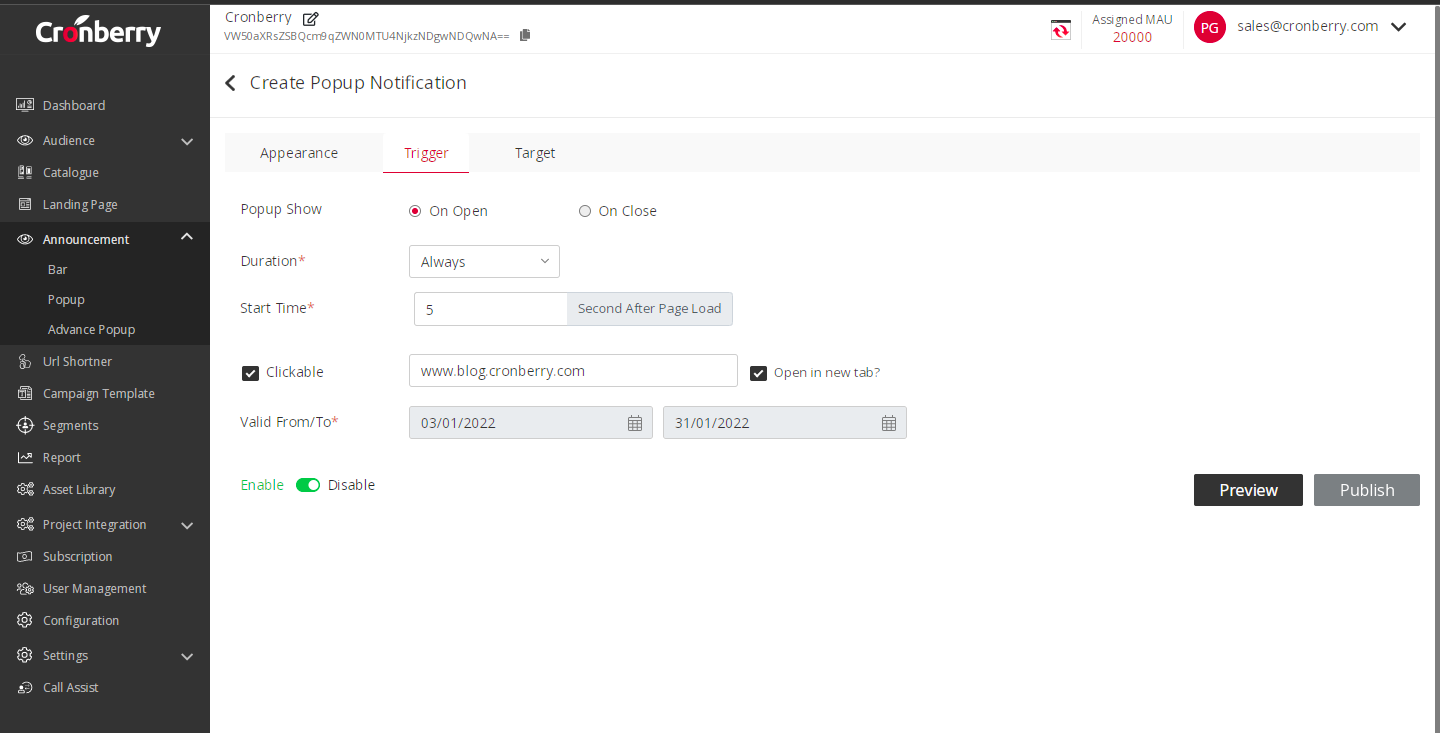
- Next, come to the Trigger section, enter the other details here like popup show (when do you want to show the popup, on open or close), duration, start time, number of days you want to keep it active. Also, you can make the popup clickable by ticking the checkbox and entering the URL where you want the visitor to redirect .
- Once done, tap on Preview.
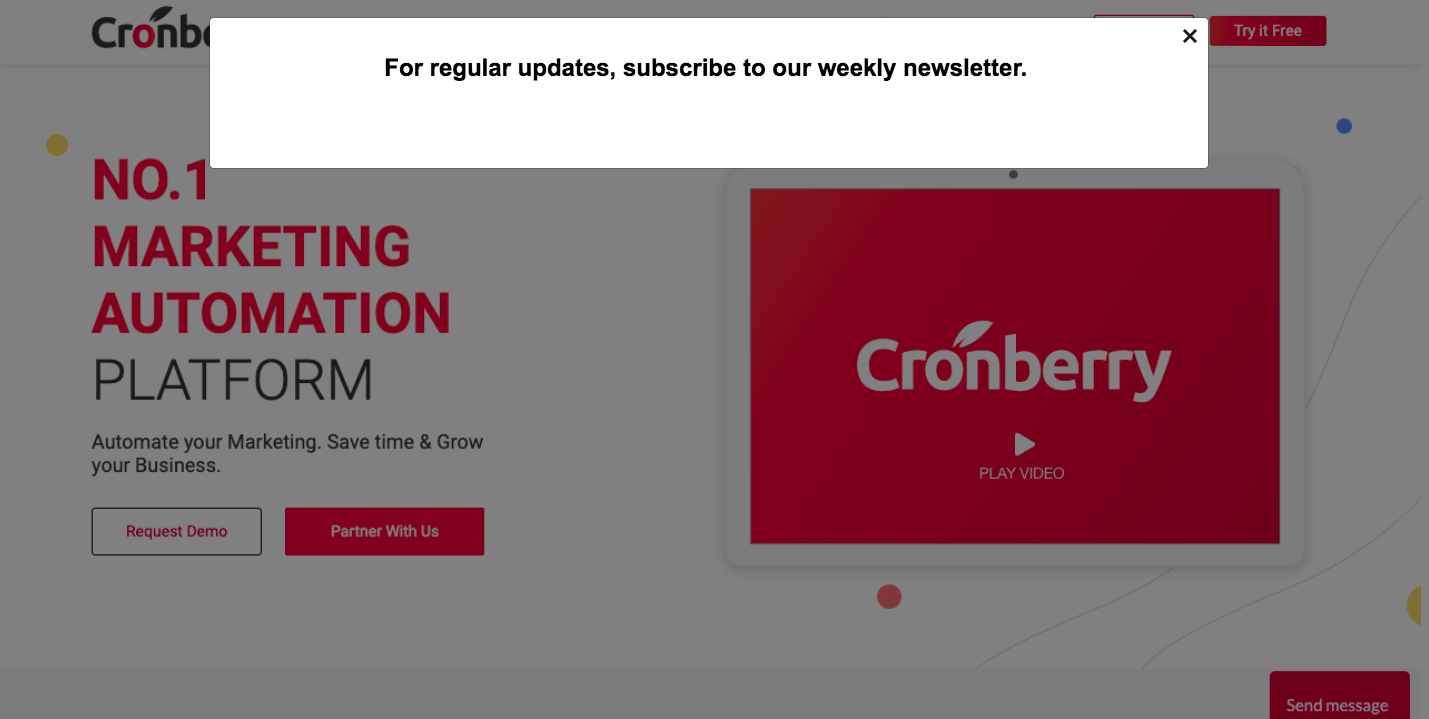
- Here is the preview of the popup we created. You can make further changes if you feel so, and if you’re satisfied with the preview, go ahead and publish it. That’s it done. You’re all set to flaunt the popup functionality at your website.
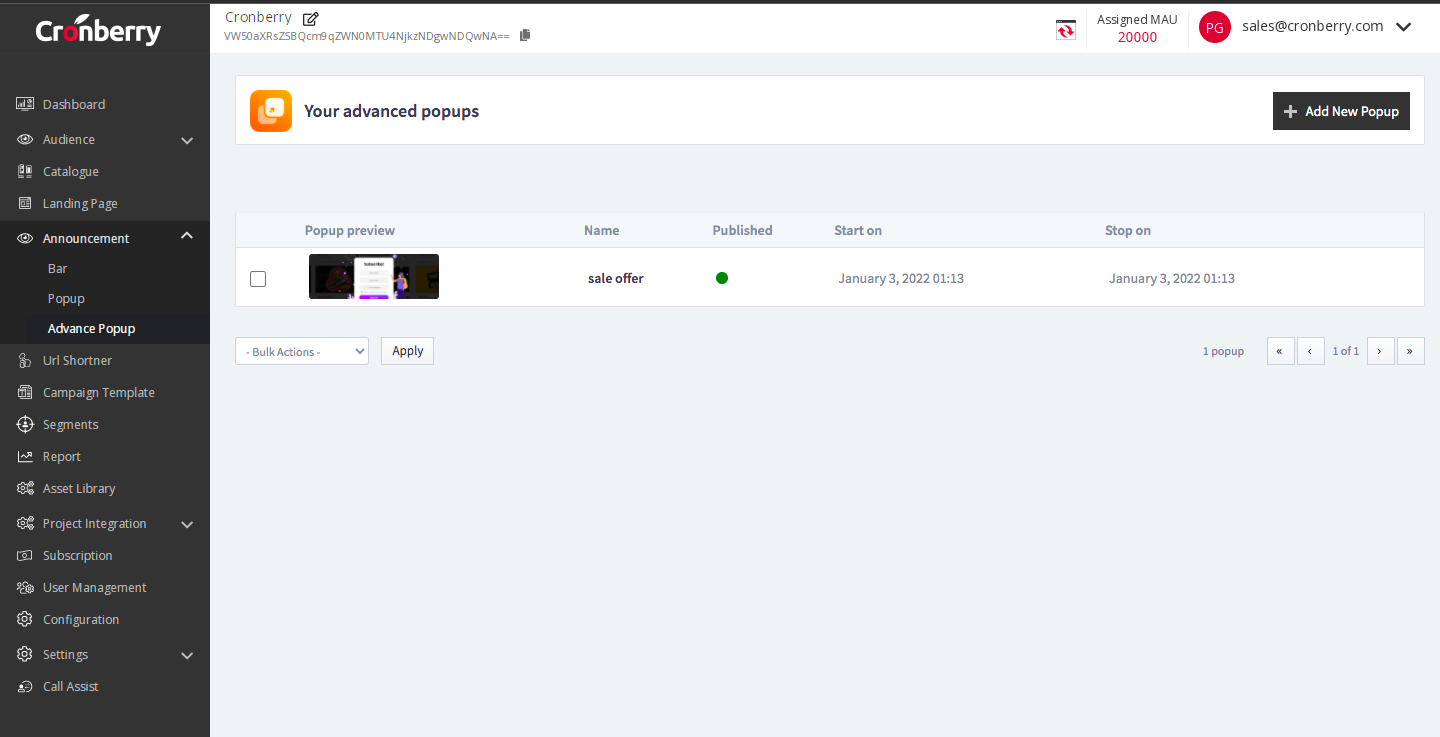
How to use Advance Popup functionality?
Last but not the least, comes Advance Popup functionality; it is an advanced version of popup functionality. Cronberry provides an already created set of exclusive templates of popups with amazing effects to drive the visitor’s attention and increase the chances of conversion.
- First, tap on Advance Popup, just below the Popup functionality in the Announcement segment. Now click on +Add New Popup button in the top right corner of the page.
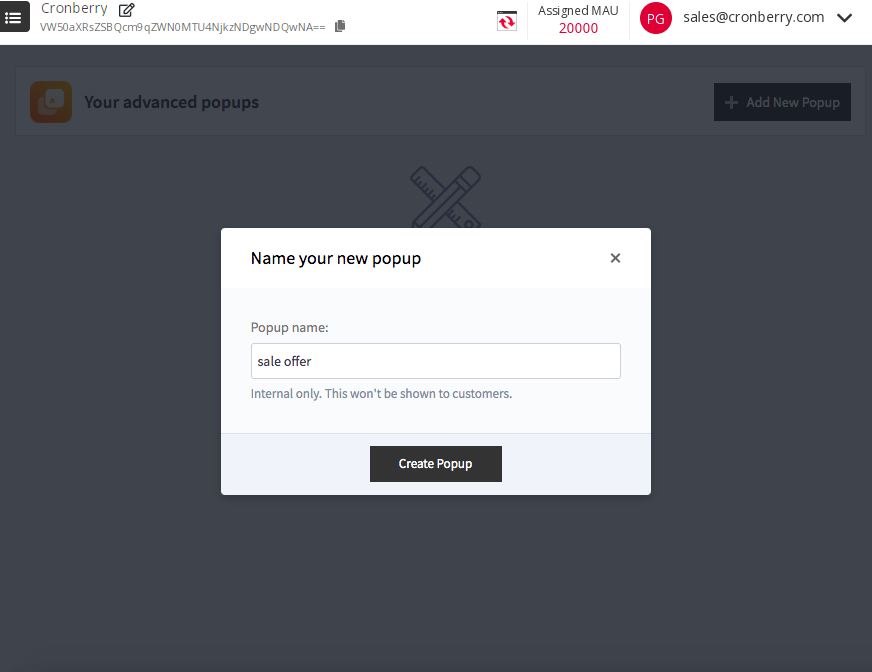
Next a dialog box will appear, here you need to mention the popup name you want to create. For instance, we’re taking Sale Offer as the name here. Now tap, Create Popup.
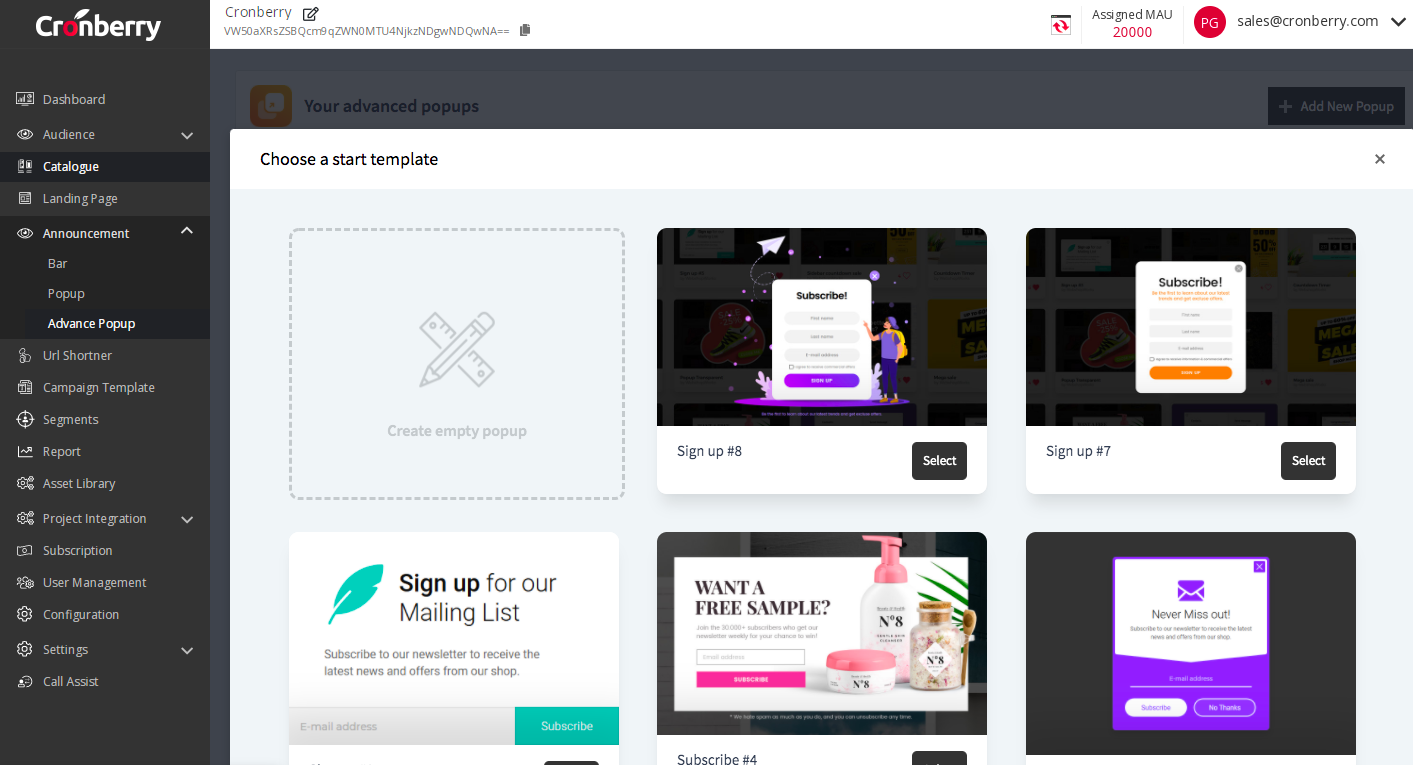
Here you can see a list of multiple beautiful already created Cronberry templates. You can choose any of them you like and even customize them as per your very specific needs. Select one. And you’re almost done.
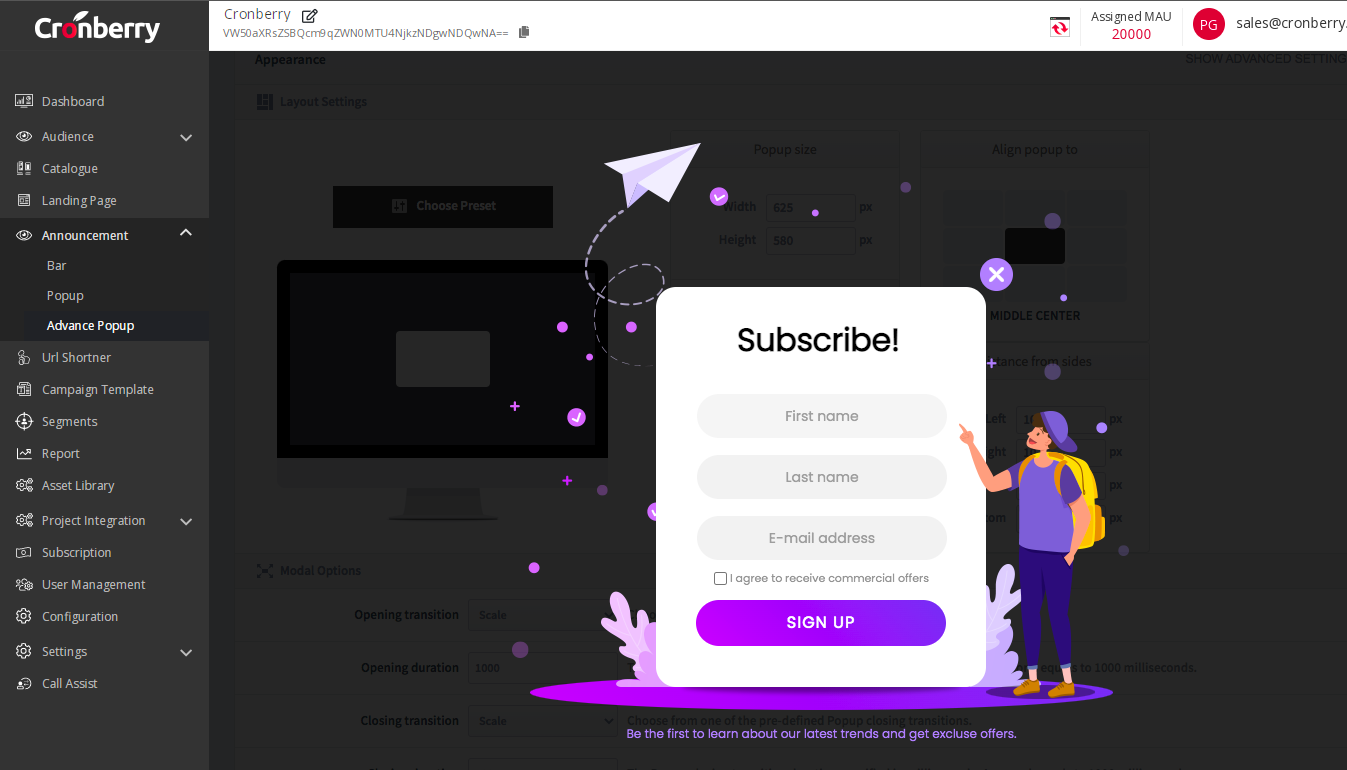
You can see the preview of the template you’ve selected. Now customize it and flaunt it on your website just the way you want and multiply the chances of conversions on the go.
That’s all for Announcement feature. This simple it is to use the most exciting feature of the Cronberry dashboard. We’ll keep on bringing new blogs with latest updates, so stay tuned with us.
Integrate your business with Cronberry Automation today
The time has come to automate the business handles making the processes more efficient and effective at the same time. Save your precious business time by automating the complete marketing tasks. Get integrated with one of India’s Leading marketing automation platform and get connected to the existing, potential, and new customers by acknowledging them in a more customized and personalized way. Unlock a more refined way of connecting with the target audiences via Emails, SMS, In-App messaging, Push Notifications, thereby organizing a segmented strategy for imparting a tailored way of interaction. Segmenting users as per their behavioral activities, engaging them, nurturing, and retaining them thereafter was never this easy before. Get your marketing hand today on the go.


